Friday 21 February 2014

Fashion Projects - Muslin for Alma Bouse view B.

What an exciting week it has been for fashion, what with London fashion week, and the award ceremonies - inspiration galore!  In addition, there was the start of the new series on BBC2 - The Great British Sewing Bee.   Well it's a good job that I am not on the sewing bee because I would never finish in time.  I like to sew at a leisurely pace. Anyway, I digress.  I want to share the progress with my current project - The Alma Blouse.

 Before I can get going on a new pattern, I usually need to make lots of alterations, especially for the upper body.  The Alma blouse was no exception.   This is not a criticism of the pattern, but something I have to do all the time. Although a simple pattern, I needed to make a lot of changes to get a good fit, and this took me a day to achieve.  

Firstly, I reduced the neckline to reduce gaping, and increased the shoulder width because of my broad shoulders.


I then made up my first muslin using kwik trace.  When I tried it on, it was apparent that several more changes were needed : -

1. The bust point was too high so that I had a surplus of fabric puffing out on my upper chest.  This was remedied by cutting the pattern across the upper chest and adding 1.5cm to the length, and then reducing the front by a corresponding 1.5 cm at the "increase or decrease here" line.  I also had to smarten up the darts.


2. The neckline was too small  (probably because I had reduced the neckline), and had lost the intended shape.  I enlarged this by marking the first muslin where I wanted the neckline to be, and then shaped the pattern using my French curve.

3.  The blouse felt tight across my shoulders.  I, therefore, checked it against my measurements, and then added some width, but tapering it down at the side seams which were fine at the lower end of the blouse.


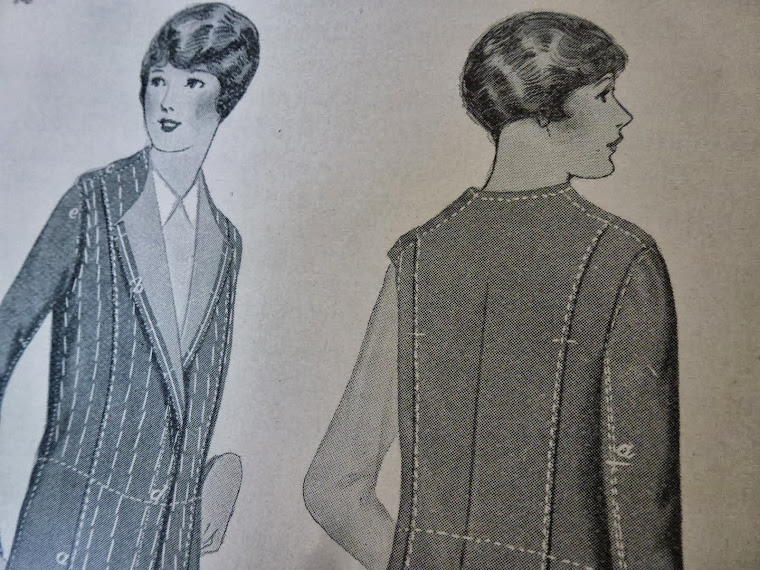
4.  The neckline was sticking out at the back.  This is a problem which I frequently encounter on ready to wear clothing (and can usually hide with my long hair).  This was remedied by adding two small darts to the neckline in the direction of the shoulder blade.  I marked the shoulder blade point on my pattern, and also re-positioned the back darts to sit just below these points.


5.  As usual, because of my sway back, there was a surplus of fabric in the lower back region.  This was corrected by pinning the muslin across the width of the lower back to take out the surplus fabric, and then transferring the changes to the pattern piece, making sure that it tapered to the edge so as not to affect the length of the side seams.

After all this, I was concerned that I had made so many changes that the pattern would not come together or resemble the original.  I made up another muslin, but this time in fabric (I used an old bed sheet).


When I tried on the second muslin, it fitted like a glove!  Success!!!!  The joy of this is the comfort a well fitting garment gives you so that you are hardly aware that you are wearing anything!  More flattering too of course.  Although not shown here, I also stitched in the sleeves, which were also a good fit.


I am indebted to one of my old books "Sewing" by Ann Ladbury, for some of the advice on alterations.

Now I have the pattern sorted, I can go ahead and make the blouse up with confidence.  I plan to make the first one in a lace fabric.  As facings will show through, I am going to exclude them, but back the lace with chiffon, and may reinforce the neck edge with satin bias binding.

If I had just sailed ahead and made up the pattern as printed, I would end up feeling disappointed with my finished garment.  It was worth the effort, and will fulfil my intention of having well made clothes that fit properly.


Thursday 13 February 2014

FASHION PROJECT - Red skirt

One of the things that I enjoy is to browse the fashion trends in advance, in order to plan what I want to buy or make for the next season.  I especially like following Vogue on line to view their photo' galleries from the catwalk shows.  Back in the Autumn, the colour red, was hailed as one of the colours to wear over the autumn and winter season.  I love to wear bright colours, especially in the winter to brighten up a dull day and, I do like red!  Red is a nice, warm, Christmassy colour.   Red goes well with black, cream, and camel, and can be worn as a bold colour statement or as an accent colour.
 
You may recall some women's magazines used to include a free sewing pattern, one of them being "Essentials" magazine.  I have a pattern which I think dates back to the mid 90's for a wrap look skirt. 


My choice was view 3 (below).


The sewing instructions are easy to follow, with clear step by step pictures in colour.


The pattern pieces were copied on to dress makers tracing paper so as not to spoil the original pattern.  I did not need to make any alterations.
 
I chose a red crepe fabric from Craftswoman fabrics which is a lovely cherry red colour.  It appears more tomato red in the photographs.


The skirt is unlined and was very easy to make with only three pattern pieces.  The wrap over style is just for effect, so there's no risk of it gaping open.  I added fabric covered buttons which I made using the same fabric as the skirt. 
 
 
 I enjoy hand sewing and so top stitched the area around the buttons by hand, and the zip and hem were also hand sewn.  This I do while relaxing in front of the television of an evening.
 
 
 The skirt has a high waist, with no waist band, and so looks best with blouses tucked in to show off the waist and button detailing.  It has proven to be a very comfortable skirt and ideal for a day at work.  I have been wearing it mostly with either a cream blouse, or black tops, black tights and black patent shoes. 
 
I will enjoy wearing this skirt for years to come and I shall be wearing it on Valentines day. 

I look forward to making some more versions.
 
(My plan is to start posting pictures of me modelling my clothes as with other blogs, dependent on my husband being around in the day time when it's not dark).

Tuesday 11 February 2014

INSPIRATION - Mary Quant

As it's Mary Quant's birthday today, I decided on a short post to acknowledge her place in the history of fashion.

Mary is attributed for the mini skirt which has remained a timeless classic ever since it's debut in the 1960's.  Apparently it came from a celebration of women's new found liberty, and to enable them to run for the bus!


Do you remember "hot pants"?  This is something else we can thank Mary for.  When these came out, most of the girls in my school either had a pair, or wanted them.  Mine were navy blue crimpline (mmm, nice!).

Here is Mary Hopkins modelling the mini. Those were the days my friends!


Bye the way I won't be making a mini skirt or hot pants - my legs are best left covered up.  

I plan to make a spotty pleated skirt, having been inspired by my recent Boden catalogue.


My next post on Thursday will be about another skirt that I made recently.


Thursday 6 February 2014

FASHION PROJECTS - preparing patterns

With my mind on fashion projects for the Spring and Summer, I have now set about preparing some patterns.  I want to make a few blouses (including one in lace), a couple of dresses, a spotty pleated skirt, and some cropped trousers.


Having read other #sewing blogs featuring Sewaholic's "Alma" blouse, I just have to make one!  It's a lovely and versatile pattern with lots of options and no complicated bits.


Something which I discovered last year, when I started to re-kindle my interest in making my own clothes, was that my upper body shape doesn't resemble any sewing patterns, unless they are loose fitting.  Until then, I had never heard of a "sway back".  A dress that I made was puffing out at the back with a surplus of fabric.   Waistlines were more in line with the middle of my ribs!  When I did make a dress (which I was proud of), I had to re-draft the bodice from scratch.

So, this year, I plan to carefully adjust the pattern pieces, and make muslin's first.  All this, of course, takes time!  So no quick projects for me I'm afraid.

I have now spent a day copying some pattern pieces, so that I can adjust, and slash away at them, without ruining my original patterns.

I have bought some @Kwik Trace, which I believe I can use for the muslins.  If not,  I will use an old sheet or buy some calico.


This is how I copied my pattern pieces:-

I used some sheets of paper from a flip chart, a tracing wheel, ruler, and marker pen.  All the original pattern pieces were carefully pressed flat with a dry iron.

First of all, I pinned the pattern pieces to the paper.  Then I marked the corners with dots, and drew the matching points with a marker pen.  I traced carefully around the pattern pieces using a tracing wheel to score the paper; also marking adjustment lines, straight of grain, and darts.


Where the pattern had straight lines, I carefully folded back the pattern pieces and joined the dots, before completely removing the pattern.


Using the marker pen, I drew over the little holes created by the tracing wheel.


Meanwhile, I practiced being mindfully in the moment (a great way to experience a state of "flow" and avoid mistakes).


I shall not cut out the reproduced pattern pieces until I have checked them against my own measurements and made any adjustments.


Although this is a lot of work, I hope that it will prove worthwhile in helping me to achieve a good fit and provide me with adjusted pattern pieces that I will be able to use confidently again in future.

LEARNING POINT :- #Sewing clothes well takes time! + Improving my technical drawing skills.