Thursday 27 November 2014

PONCHO - PART 2

PONCHO  PART  2
 
2 Giraffe's grazing on the new spring growth in Kruger Park
 
 
So I have now returned from my holiday in sunny South Africa and feel blessed in having an extended summer this year.  Not only that, but Autumn here in England has been un seasonally warm as well.
 
If you have not read my previous post, then I urge you to do so if you are planning on making a poncho or other Autumn garment in a wool fabric, as there are some important considerations.  Now, I have one more to add - take good care of wool fabrics in your stash - yesterday I discovered that one of my fabrics has a sprinkle of moth holes in it!  You have been warned!
 
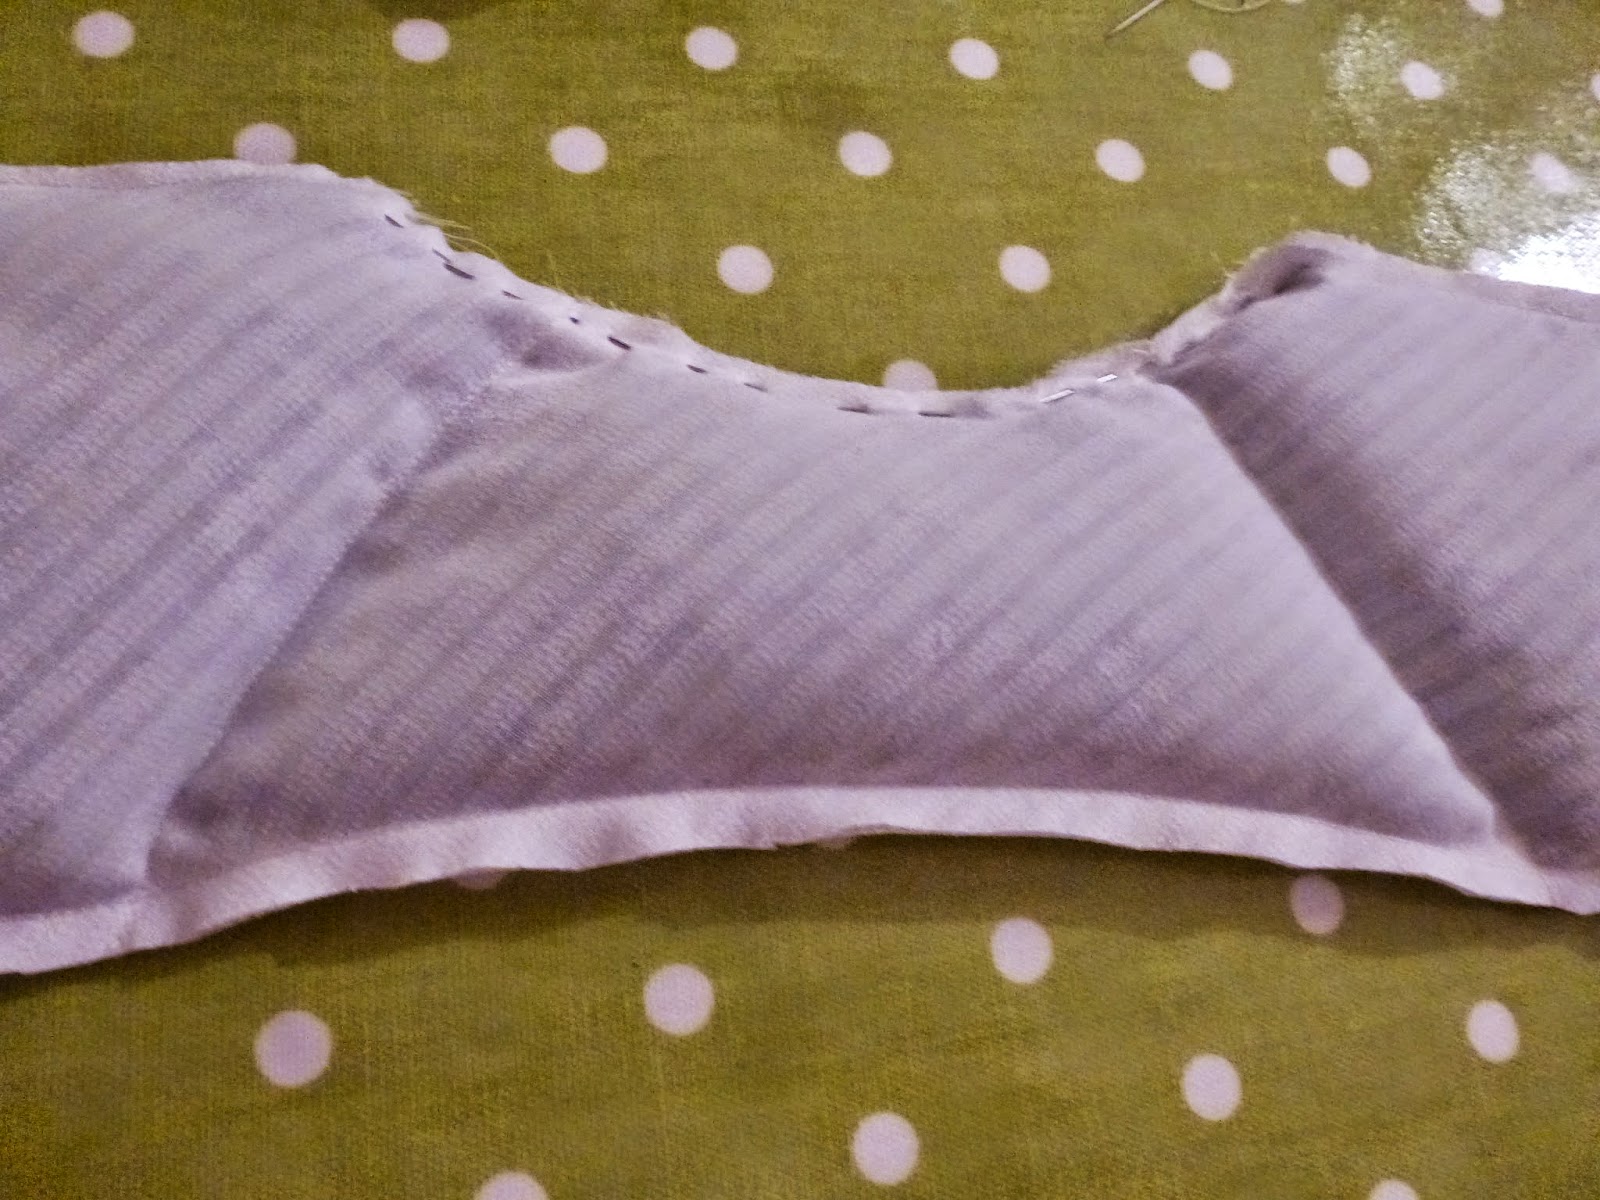
Would I make another poncho?  Probably not.  Although it was a useful experience in getting me to face some anxiety about using different fabrics - namely stretchy ones.  If you have the benefit of an overlocker (or serger), then the process is probably less daunting for you.  So why wouldn't I make another?  Firstly, I have since seen some really lovely ones in the shops which are better and nicer than mine., and...secondly, it was impossible for me to neaten the edges using my sewing machine.  So I ended up with what I consider a rather amateur looking edge, in spite of my best attempt at neat hand sewing.
 
My research on the internet led me to a blog post by Mollytov for a cowl neck poncho - so I am indebted to Mollytov for her tutorial and diagram of what to do.  Thank you, Mollytov.
 
Basically, you need a large rectangle of fabric, and cut a hole in the middle for your head!  Mollytov added a cowl neck to hers which was a nice touch.  I refrained from adding a cowl neck to mine because I am sensitive to wool and know that it would bring me out in a rash all over my neck.  I had some grand ideas about using faux fur instead, but as I was a little disappointed with my end product I did not want the additional expense.
 
I changed the dimensions to suit my height etc.  I also wanted to make use of the double sided two tone colours, and decided to make mine lop sided - or should I say, asymmetrical.  
 
I now have a cosy poncho, for wearing on chilly days, and I reckon that I may wear it indoors sometimes as well.
 
I have kept the off cuts of fabric, because my poncho is essentially a large rectangle.  So, when it is no longer very fashionable, I hope to be able to craft it into something else....if I get the hang of handling bulky fabrics that fray!
 
Here is me modelling it.  Not a good picture is it?  I put my camera on a self timer, and I wasn't looking my best. 


Modelling my new Poncho (it's November and I still have sweet peas!)


Friday 3 October 2014

FASHION PROJECT - DIY PONCHO - WORK IN PROGRESS

D.I.Y. PONCHO
WORK IN PROGRESS PREVIEW


What a lovely month September has been.    Gorgeous warm sunny days.  Now that it is turning cooler and darker, my attention is being drawn to thoughts of warmer clothing. I like the trend for casual and comfy wear, especially all the lovely cosy baggy cardies, shawls, and poncho's.
 
For a while now, I have fancied having a go at making a poncho.  The last time I had one  I was about 9 years old - it was multi coloured crochet, complete with tassels and pom poms.
 
This is my "work in progress" report, because I am going on holiday tomorrow, and haven't had time to finish my poncho before I go away.
 
After trawling through the internet for idea's, I made my own pattern.  I will explain the process in more detail in my next post.  It was not complicated and  I am not a pattern drafter! ..but I can figure out something basic, with the help of some flip chart paper, ruler, tape measure, and eye balling it.
 
Just a quick tip though - if, like me, you pre-wash your fabric.  I bought a wool jersey, and washed it on a cool wool wash.  The result was that my 2m of fabric became 1.6m, shrinking a whopping 40cm.  So, either don't wash it first, or buy more fabric than you need.  The fabric was much thicker than I expected (it was before I washed it too), and did not look good when sewn on my machine.  So I decided that I had no choice but to neaten the edges by hand using blanket stitch - hence it looks a bit wobbly, or dare I say, home made?  No, no, no,  couture!...have you ever looked up close at some of the gowns on display at exhibitions - the hand stitching is not always that good either.
 
When I've finished, I will post more details of how it was made.  I may even model it when I've given it a lick with the clothes brush.


Monday 15 September 2014

CRAFT PROJECT - LAVENDER CREATURE COMFORTS


THIS IS WHAT I'VE MADE


Anyone driving around North Hampshire in July could imagine themselves in Provence!  For some of the fields will be swathed with row upon row of purple lavender.

Personally I love lavender, as the scent takes me back to my childhood, buying lavender bags at summer fetes, and finding them hidden among your clothes.  Last year, I made some lavender bags to hang in my wardrobe using flowers harvested from my garden.  I used organza so that I could see the lavender flowers through the fabric.

This year, being also a lover of anything that is tactile and gives comfort, I wanted to make a few treats for myself.

I found some pretty liberty fabric in the remnant section of my local fabric shop 0.4m for just over £4.00.  The print reflects the colours of the lavender fields, making it the perfect choice.


I bought a large bag of dried lavender from a local producer (Long Barn near Winchester).


 Long Barn provided Lavender to Jane Packer for her Olympic bouquets in 2012.  I love the calico sack - I may use this to make a little rustic cushion for the conservatory.  The little sack of flowers smelt divine (although when I wafted it for my husband to sniff, anyone would think I had dangled a dead rat in his face, judging by his reaction!).

My plan was to make a lavender neck pillow that I could heat up and drape around my shoulders,


a hot water bottle cover with a pocket for a lavender bag (mini hot water bottle),


 and a lavender eye mask.


I researched the internet because I wanted to be able to heat up the neck pillow (like the wheat products you can get).  I discovered that using Linseed is better that wheat because the seeds are smoother and softer, and the high oil content warms up with your body heat.  The recommended ratio of Linseed to Lavender is either 3/4 Linseed and 1/4 Lavender', or 2/3 Linseed and 1/3 Lavender.  The seeds and flowers should not be packed too tight, as you will need to be able to drape the pillow.  Apparently, you can warm them in the oven, but they can catch on fire!  I will warm mine up by draping it over a radiator instead (as I don't trust myself not to forget about it until it's too late).

The neck pillow was first made using some white cotton fabric, and then covered with the liberty print fabric.


The hot water bottle cover was quilted to add extra softness and prevent scalding. 


As with anything like this, I can always think of ways I would make something different next time.  For example, I would make the neck pillow slightly longer, and remember to turn the inner pillow inside out before stitching the dividing seam sections!

My next plan is to make some little hand warmers for chilly days ahead.

Feeling cozy......

Saturday 30 August 2014

FABRIC TREASURE HUNT

FABRIC TREASURE HUNT


If you enjoy looking out for nice fabrics to add to your stash, a holiday abroad is a great opportunity to go exploring for textile treasures. 

*****


I have recently been to Madeira and visited a wonderful fabric shop in Funchal.  As I knew that I would want to linger, my husband graciously departed to a local bar for a beer and to watch one of the World Cup matches! There was a large selection of fabrics suitable for home sewing, whether you like making clothes or home furnishings. 

The shop is called Feira Dos Tecidos - web address www.feiradostecidos.com.  I have taken a look at their website which is based in Portugal - unfortunately it is not very inspiring and does not do justice to their shop.


I could have really gone to town and bought loads of fabric because it was so much cheaper than here in the U.K., but  I am finding that I am buying fabric faster than I can sew it, so I limited myself to three gorgeous lots as follows:-


This was a remnant of 1.3m medium weight silk satin, priced at 4,95e (£3.97).  This would be just enough fabric to make a short sleeved blouse or top.

 
This is my favourite.  It is a lightweight Italian silk, with a paisley type of design and bordered with blue stripes.  I think that it will make a lovely floaty summer tunic.  I bought 2 meters at 7,95 ((£6.37 per meter).


T
 
This fabric is a Italian crepe de chine, with a cream background and all over black spot design.  I  plan to make a long sleeved Alma Blouse with this.  I again bought 2 meters at 7,95e. 

Believe me, choosing only 3 fabrics was very hard to do because they had a fantastic selection of new season Italian silk all priced at only 7.95e!

I also bought 3 invisible zips for 0,35e each (about 28p).


I  found another little shop which specialised in trimmings, and couldn't resist buying a couple of types of insert style embroidery anglaise lace.  I think these would be lovely on a lightweight cotton lawn blouse for summer, and any left overs will be useful for small craft projects.


Tuesday 1 July 2014

My version of the Belcarra blouse by Sewaholic


THE BECLARRA


Anyone familiar with Sewaholic will be aware of their latest pattern - The Belcarra blouse.  One of the advantages of these patterns is that beginners can follow a sewalong - with step by step instructions, and then showcase their efforts on flickr.  I love seeing other peoples interpretations of a pattern, and they give me ideas of what I want to make.
 
 *****

 
I am wanting to increase my wardrobe of pretty blouses because they are so adaptable, being suitable for work and smart functions, or simply to dress up a pair of jeans.

Before I got to work to make mine, I copied the pattern onto Kwik Trace, and made it up as the blouse.  This enables me to see where I need to make any alterations.  For me, I made my usual sway back  and narrow chest adjustment, and also decided that I wanted it less fitted (more flattering on a middle aged figure!).


As this was my first attempt, I chose a modestly priced polyester satin which I purchased some time ago from Craftswoman fabrics.  Although drapey, it was easy to cut out and sew.  I bought the lace specifically to embellish the blouse - a guipure lace from my local fabric shop C & H Fabrics, using my £5.00 voucher for entering their sewing bee competition. 

You can see from the photographs that I applied the lace using two matching rows as a front panel and as a panel on the sleeves. 


Before applying the lace to the actual garment, I made a test piece.  First I tried applying it by machine, but it was too stiff - consequently my original plan to cut away the satin behind the lace had to be abandoned.  I found that by sewing the lace carefully on by hand, enabled the garment to maintain the movement and flexibility of the satin.


 I am delighted with the results.  The blouse is easy to make with clear instructions, and there are no fiddly bits such as zips or button holes. I chose not to turn up the sleeves because I did not want to cover up the lace.  It is a good project for someone new to dressmaking. 

The blouse looks pretty tucked in as seen in my photographs, or loose over a pair of trousers or jeans.  The blouse is very comfortable to wear, and nice and airy so no risk of underarm stains.  I can't wait to make some more.

Here I am modelling my blouse while on holiday in Madeira.  I wore it to have afternoon tea at Reid's Palace Hotel.


TIP: As you have to pull the blouse over your head, apply your lipstick afterwards.


Tuesday 3 June 2014

A SPOTTY BLOUSE (New Look 6107)

I am going through a blouse phase.  I have intended to make some pretty blouses for myself once I became more competent in my sewing skills, inspired by the many lovely patterns out there.

Blouses seem to be going through a bit of a renaissance at the moment, with plenty of them in the shops from the traditional shirt  to more feminine chiffon styles. 

I have had a lovely spotty fabric in my "stash" for a while now, which I bought to team up with my red crepe skirt (see previous post).  I decided to use the fabric to make a blouse for a local sewing bee competition at C&H Fabrics , using the New Look pattern 6107, view B.


 The pattern was easy to follow with clear instructions.  The only thing that I would say is that it is quite low cut at the bust and being loose fitting could be revealing if you bend over!  I also found that my button loops were initially too big (I followed the instructions to the letter, honest), so I  decided to make them smaller, to fit over the fabric covered buttons. 


I was slightly concerned that it would look dated as it reminded me of some blouses that I wore in the late 90's.


 It's probably not a pattern you would choose if you like to follow current fashion trends. However, it does look pretty, and fits like a dream.


One of the things that I like to do is check out other people's versions of a pattern, and I found several versions of this blouse on google images.  It looks surprisingly good is a bold print too.

The competition was a great opportunity to up my game, take time over my project, and not cut corners!  The blouse did take me a long time to make, as I basted all the seams before sewing, and added French seams, as well as cover the buttons .  It was worth it (no I didn't win) for the sheer pleasure of taking my time and having a professional looking garment that I am proud to wear.


I also had some left over fabric so decided to make a matching padded hanger as well!


Although I didn't win the competition, my blouse did make it into the shop window for a week.

I am currently making the sewaholic Belcarra blouse, and will post a review soon.


Tuesday 29 April 2014

10 TIPS (so far) FOR SUCCESS IN SEWING (with no pictures!)

I have been sewing on and off for years.  My earliest recollection was being shown by my grandmother how to sew on a button when I was about six years old.  As a teenager, I was not that interested in sewing or dressmaking.  The 70's and early 80's was an era of change, and anything to do with domesticity was rejected.  Instead, I was a reader of Cosmo, and imagined myself being a career woman!  I dabbled in making clothes in my early 20's, using my Mum's Singer sewing machine, with moderate success.  I even made some Madonna style fingerless gloves!  Only recently, have I taken up sewing more seriously again, since deciding to work part time, and having time for me.

My sewing is a work in progress, and I am learning all the time, still not brave enough to tackle anything like a jacket or coat.  However, I have just submitted a blouse to a local shop - C&H Fabrics, who are running a fun sewing bee competition.  When the results have been published, I will share my project.  It would be lovely to win a prize, but I am not that optimistic, after hearing another lady say that she never used sewing patterns and would make up her own design.  Yikes!! Big gulp!

I thought that it would be useful to share some of the things that I have found helpful, to avoid making some of the mistakes that I have done.

1. Don't be too ambitious to begin with.  I made an expensive mistake back in 2010, when I decided that I would make my own wedding dress!  Far too ambitious.  I ended up buying one two weeks before the big day.

2. Take photographs of the back of the pattern envelope with your phone.  You then have the information you need to buy the right amount of fabric and correct notions!  I came to this idea when I found myself liking a fabric, and then having to leaf through the pattern books to find the pattern and information that I needed.

3. Sign up for lessons if you can.  It is more fun learning with other people who have the same skill level, and you are less likely to make mistakes and become disillusioned.

4. Be patient.  Dressmaking takes time, and sometimes the pattern instructions can be confusing.  I am still amazed when I read blogs that refer to making something in a few hours - it takes me that long just to cut something out!  Anyway, I enjoy the process of making something as much as the satisfaction of seeing the end result.

5.  Don't expect to save much money.  Sewing clothes can be costly, when you consider the cost of a pattern, fabric, and notions.

6.  Look out in charity shops for clothes that have nice fabric and can be converted into something new.  You may also be lucky enough to buy a length of fabric at a knock down price.  I have quite a few lengths of fabric in my "stash", which I paid next to nothing for.

7.  If in doubt about the fit, make a mock up (or toile) in an old bit of fabric such as an old bed sheet.  Also consider inserting a zip as well.   I have found that fitting garments is the most challenging aspect of sewing - patterns vary quite a bit too, and it's quite hard to fit a garment by yourself!  The fabric will also affect the fit.

8.  Study your own "off the peg" clothes.  I have learnt a lot about construction and choosing the right kind of fabric, as well as getting idea's for embellishments.

9.  Don't be put off by plain looking patterns.  They can be given the wow factor by using a dramatic or luxurious fabric.

10.  Warning!  You can become obsessed.  I can find myself lying in bed at night dreaming up what I could make.  Or I can find myself looking at clothes in shops and thinking that I can make it cheaper - this is sort of true, if I had an infinite amount of time and did nothing but sew!

Happy sewing!


Saturday 19 April 2014

A SNIP - SHRUG EASTER WEEKEND PROJECT


It's Easter Saturday, and as I write, the sun is shining.  Today, I am going to write about something a little different - how I made a simple and cheap shrug bought from a supermarket, into something a bit more special.
 
For a long time, I have been looking for a lightweight, white cotton cardigan or shrug, to wear with a few favourite sleeveless summer dresses.  In the past, I used to be able to buy pretty little cotton lace knitted cardigans in M&S, that went with everything, but they don't do them anymore.  Most of what I find nowadays is in ivory, not white.
 
Well, I happened to be doing my weekly shop, and came across a little lightweight shrug, in white with scalloped edges, and made from 80% cotton, 20% nylon.  A snip at £8.00 (made in Cambodia).  Perfect!  I only hope that the people who made this garment were paid fairly. 
 
I was reminded of little cardigans in the medium price range market (about £50 - £60), that have been embellished with lace (as is the current trend). 
 
I have an old biscuit tin, with scraps of lace.


I raided my tin, and found some cotton lace that was the perfect width (about an inch wide), that was scalloped along one edge, mirroring the scalloped edges of the shrug.


This was a simple transformation.  I simply pinned the lace around the edges


..and stitched in place using the stretch stitch on my sewing machine.  The ends were finished by hand sewing, turning under the edges to prevent fraying.  Then pressed. 


I am pleased with the results, and look forward to wearing it with my favourite summer dresses. 


Right now, the supermarket in question has 25% off all clothing, so you could get hold of the same shrug for a mere £6.00.
 
Lovely!
 
And now for something not sewing related.  Here is a picture of my Easter Simnel cake. 


I used a favourite recipe from a book - Glorious Cakes by Ann Nicol.  I decorated the top with lightly toasted marzipan (toast the top of the cake, then add the balls of marzipan using egg white as glue and toast lightly).  When the marzipan had cooled, I put a puddle of glace icing in the centre, and decorated with crystalised violets and a primrose from my garden.


Have a wonderful Easter everyone!


Thursday 10 April 2014

FASHION PROJECT - Holiday dress with orchids on.

If you like flowers and plants, you may know that this weekend see's the Royal Horticultural Society's Orchid and Botanical Art Show in London.  So, what better time than to share my "orchid dress".


My first attempt at this dress was 7 years ago, when I decided to dust off my sewing machine and have a go at making some clothes.  The problem was that I had not done any dress making for years, and naively cut out my pattern size without checking my measurements....and guess what? The bodice didn't fit at all!  Feeling disappointed, the unmade dress went into the stash pile, with the intention of trying to make it again when I was feeling more confident.
 
Recently, I fell in love with Kate Spades collection using a summery print with lemons on!  It reminded me of my orchid fabric hidden in my stash pile because of the bright colours contrast against the white. 
 
 
 I  made the dress using the same pattern as before - Butterick B4443, view C.  I believe this is a popular pattern for making bridesmaids dresses.
 
 
I re-drafted the bodice, and made a toile first, which seemed to fit quite well.  

 
Close up view of bodice


Front of dress with belt tied at the back

The changes that I made were to back the fabric instead of lining it (because my fabric was a fine lawn and fairly transparent), and to increase the length of the belt.  I used a contrasting colour for the belt, which slightly clashes but I think adds a bit of zing!


Rear view of the dress

 
Front view with belt tied at the front

 After recently reading Handmade Jane's post on adding a waist stay, I decided to add this too - I just need to add the fasteners when I next get a chance to visit my local sewing supplier.


Waist stay 


 On the day I took the pictures I wasn't feeling well, with a cold and a red nose.  Hence the dummy is my substitute model.  The dress fits well though, and I am looking forward to wearing it.

WHAT I LEARNT

That when I cut out the skirt all those years ago, I failed to notice that I had cut the back pattern pieces upside down - oops!  I don't think that it is too obvious though.

WHAT I WOULD DO DIFFERENTLY NEXT TIME

As the skirt is circular, the hem is quite tricky, and more so having been backed,  creating unnecessary bulk at the hemline.  Instead, I would opt for a full dress length lining instead.


Dreaming of balmy warm sunny mediteranean days, with a cool limoncello.  Imagining myself perched at a table overlooking the sea, wearing my dress and  new white wedges.  La dolce vita!

Have a good weekend folks!  I am off to Lymington in Hampshire to visit my (grown up) children before Easter.